How to Clean and Maintain Your Commercial Bounce House
Why Maintenance Is Your Biggest ROI Lever
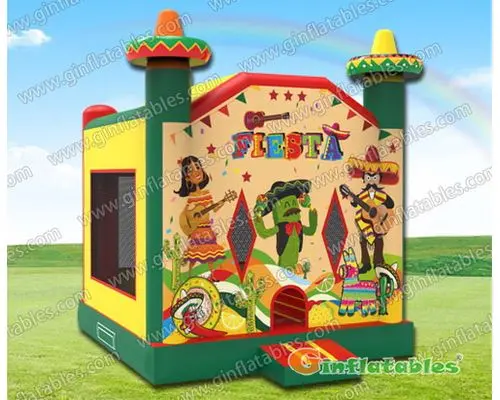
A commercial bounce house is a significant investment. Most operators focus on booking volume to recover that cost — but the real leverage is in how long the unit stays rentable. A well-maintained inflatable from your inflatable bouncers lineup can run 7+ seasons. A neglected one is retired in three.
The math is simple: if you spend 15 minutes cleaning after every event and 90 minutes on a monthly deep clean, you add years to the unit's service life. The operators who skip those steps don't save time — they just pay for it later with emergency repairs, premature replacements, and lost booking revenue during downtime.
This guide covers the full maintenance stack: daily post-event routine, monthly protocol, patch repair procedures for PVC and vinyl, seam repair, seasonal storage, and the warning signs that tell you a unit has reached end of life.
Post-Event Cleaning: The 15-Minute Routine
Start before the blower goes off. While the unit is still inflated, do a visual pass for debris, stains, and any obvious damage. Deflating before inspection means you lose 10 minutes re-inflating if you find something that needs attention while fully pressurized.
What you need:
- Garden hose or pump sprayer
- Soft-bristle brush (not wire)
- Mild commercial disinfectant — quaternary ammonium at 200–400 ppm, or a diluted bleach solution (1 oz bleach per gallon of water, no stronger)
- Microfiber cloths or clean rags
Procedure:
- Remove all debris — shoes, socks, food wrappers. Shake out the interior if accessible.
- Spray interior surfaces with disinfectant solution. Let dwell for 2–3 minutes before wiping. Don't skip dwell time — it's when the active ingredient actually kills pathogens.
- Wipe down all contact surfaces: walls, floor, slide lanes. Focus on high-touch areas — entrance edges, netting, and the slide apron.
- Rinse the exterior with a hose if the unit was used outdoors or in dusty conditions.
- Dry thoroughly before rolling. This is non-negotiable. Moisture trapped in a rolled unit develops mildew within 48 hours, and mildew weakens PVC over time.
Total time on a two-operator crew: 12–18 minutes. Do not skip drying to save 5 minutes. The cost of mold remediation on a full castle is hours of work and a bottle of commercial mold remover — best case. Worst case, you're patching or replacing panels.
Monthly Deep Clean Protocol
Once a month — or after every 8–10 events, whichever comes first — do a full deep clean. This catches buildup that post-event cleaning misses: sunscreen residue, body oils, and biological contamination that disinfectant wipes don't fully remove at surface level.
Products that work:
- Commercial enzyme cleaner (breaks down organic matter): diluted per label, typically 1:10 with water
- 303 Fabric Guard or similar UV protectant for the exterior (apply after cleaning, not before)
- Inflatable-safe mold remover if needed — avoid acetone or solvent-based products, which degrade PVC plasticizers
Procedure:
- Inflate fully. Work in sections.
- Apply enzyme cleaner to interior surfaces. Agitate with soft brush using circular motion. Pay attention to seam lines — grime accumulates in the stitching channel.
- Rinse and wipe dry.
- Flip and clean the exterior. Check anchor points, D-rings, and stake loops for wear.
- Apply UV protectant to exterior surfaces exposed to direct sun. UV degradation is a primary cause of color fading and material brittleness in commercial-grade PVC.
- Document condition in your maintenance log. Note any small scuffs, thin spots, or seam stress areas to monitor next month.
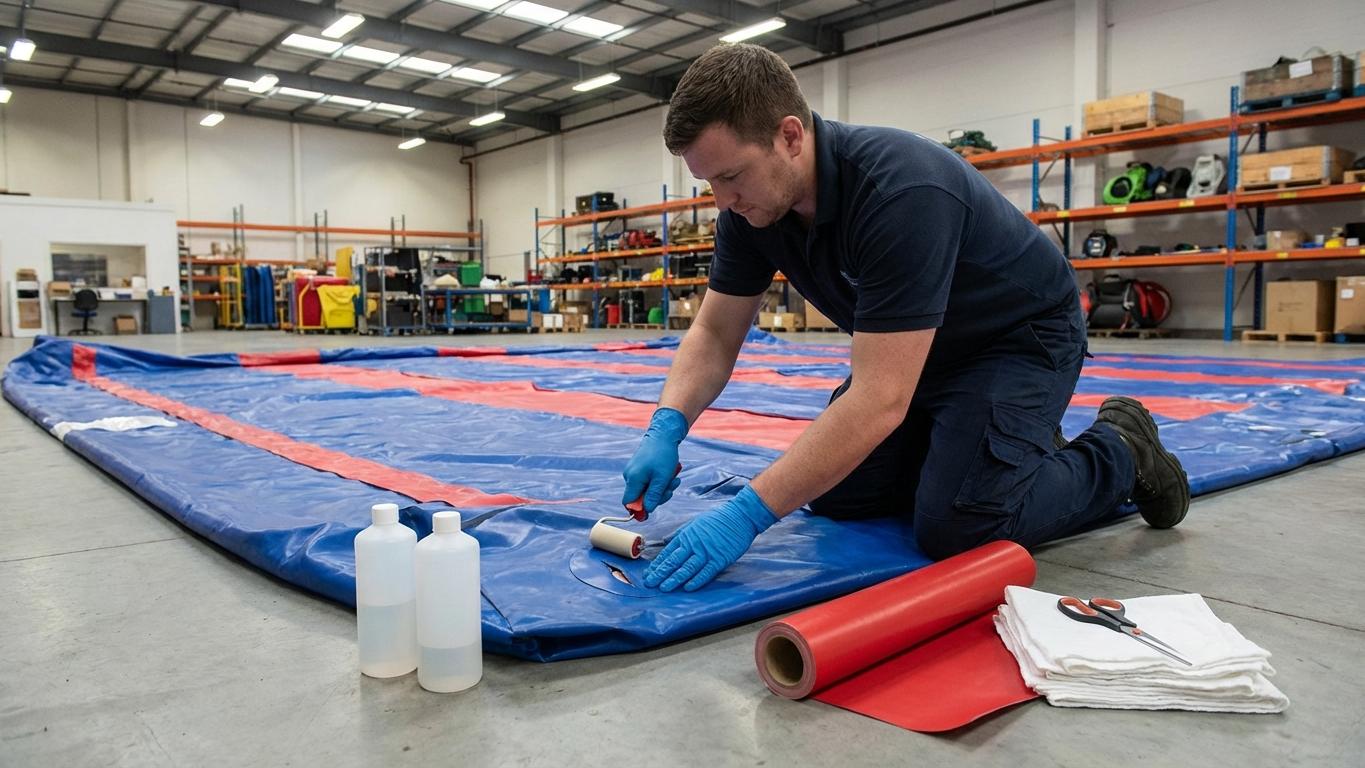
Patch Repair: Step-by-Step for PVC and Vinyl Units
A quality bounce house repair kit handles the majority of field damage: punctures under 3 inches, abrasion tears, and small seam separations. Understanding the material you're working with matters — PVC and vinyl bond differently, and using the wrong adhesive voids the repair within a season. For a breakdown of material differences that affect repair methods, see our guide on PVC vs Oxford Cloth.
Standard inflatable repair kit contents:
- PVC patch material (matching color if available; clear patches for hidden areas)
- Vinyl cement or PVC-compatible contact adhesive
- Roller or flat applicator
- Isopropyl alcohol (90%+) for surface prep
- Scissors or a punch for cutting clean patch shapes
Patch procedure:
- Locate and mark the damage. Inflate the unit and run your hand across the surface — air pressure guides you to the source. Mark with chalk or tape.
- Deflate. Never patch under pressure. The adhesive won't bond to a surface under tension.
- Clean the area. Wipe with 90%+ isopropyl alcohol in a 4-inch radius around the damage. Let dry completely — at least 3 minutes. Any residual moisture or cleaning product kills the bond.
- Cut the patch. Patch should overlap the damage by at least 1.5 inches on all sides. Round the corners — square corners peel at the edges under flex stress.
- Apply adhesive. Coat both the patch and the repair surface. Let sit for 3–5 minutes until tacky (not wet). This is contact cement — both surfaces need to be primed before joining.
- Apply the patch. Press firmly from the center outward. Use a roller or the back of a spoon to eliminate air bubbles.
- Cure time. 24 hours minimum before inflation. 48 hours before use under load. Rushing cure time is the single most common cause of patch failure.
An inflatable patch kit is a fixed cost item — stock three to five per truck. Running out on-site means a damaged unit goes back deflated, which is a lost event fee and a customer service problem. Pair your repair kit with proper blower maintenance — both are covered in detail in our resource on repair kit and blower maintenance.
Seam Repair and When to Call a Professional
Seam failures are a different category from surface punctures. Commercial inflatables are heat-welded or RF-welded at the seams — that bond is structurally stronger than the base material when new. When a seam separates, it usually means the material around the weld has fatigued, not just the weld itself.
Field seam repair with adhesive is a temporary measure. It holds for 5–10 events in most cases, but the underlying fatigue continues. If the same seam re-separates after two field repairs, pull the unit from rotation and send it to a professional inflatable repair shop for heat welding.
Signs that indicate professional repair over field repair:
- Separation longer than 6 inches on a load-bearing seam
- Any seam failure on the floor panel — floor seams bear concentrated impact load
- Seam failure adjacent to an anchor point or blower connection
- Material thinning or delamination visible near the seam
Seasonal Storage Prep
End-of-season storage is the most consequential maintenance step most operators rush. Units stored damp, compressed tightly, or in temperature extremes arrive the next spring with mildew, cracked seams, and stuck material.
Storage checklist:
- Complete a full deep clean before storage — don't store post-event dirty
- Dry completely. If in doubt, inflate for 2 hours in a dry indoor environment before rolling
- Dust interior with commercial-grade talcum powder or baby powder to prevent PVC surfaces from bonding during compression
- Roll loosely — avoid tight packing that creases material along the same fold lines season after season
- Store at 40–75°F. Avoid outdoor sheds that hit temperature extremes
- Elevate off concrete floors. Ground moisture wicks through packaging
For units with water features — slides, splash pads — drain all water channels completely and leave blower ports open overnight before storage. Check the full seasonal prep requirements for your inflatable water slides inventory separately — water units need additional attention at the pump fittings and liner connections.
When to Retire a Unit: The Warning Signs
No maintenance program extends a unit's life indefinitely. Knowing when to retire a unit protects your business from liability and protects your reputation with clients.
Retire or pull from rotation when you see:
- Material thinning: Hold a flashlight against the surface in a dark space — if the weave or inner surface is visible through the PVC layer, the material has thinned past safe use threshold
- Recurring seam failures: Same seam failing more than twice in a season, regardless of repair quality
- UV degradation: Surface that chalks, cracks under flex, or has lost elasticity — this material won't hold a patch reliably
- Structural deformation: Walls that don't hold shape at rated pressure, indicating internal baffle failure
- Mold penetration: Mold that has grown through the material, not just on the surface. Surface mold is remediable; penetration is not
- Anchor point failure: D-rings or stake loops that have torn or show significant webbing wear around the attachment
When evaluating a used unit for purchase or assessing a borderline piece of existing fleet, use a structured inspection approach. Our guide on used bounce house inspection covers what to look for before money changes hands — the same checklist applies to retirement decisions on aging fleet units.
Retiring a unit at the right time also creates an opportunity to upgrade. If you're expanding or replacing, review your accessories alongside new unit purchases — blowers, repair kits, storage bags, and anchor sets are often better bundled than sourced piecemeal.
A consistent cleaning and repair routine is the difference between a bounce house that earns revenue for 3 seasons and one that earns it for 7. The operators building durable, profitable rental fleets aren't doing anything exotic — they're just doing the basics every time, without shortcuts.