Backyard Water Slide Setup: Commercial Rental Operator's Playbook
Why Backyard Deliveries Are Your Highest-Margin Bookings
Residential backyard water slide rentals consistently outperform event venue bookings on margin. The client handles the space. You handle the unit, setup, and pickup. No vendor fees, no venue coordinators, no parking headaches. But backyards come with constraints that festival grounds don't — tight gate access, uneven terrain, limited water pressure, and neighbors who notice everything.
This playbook covers the field-tested procedures that keep backyard deliveries smooth, safe, and profitable. Whether you're running a single inflatable water slide or rotating a fleet across weekend bookings, these specs and workflows apply.
Minimum Yard Dimensions by Slide Size
The number one reason for on-site cancellations is a backyard that can't fit the unit. Measure before you quote — or better, require the customer to send photos and dimensions during booking.
- Single-lane slides (12–16 ft tall): Minimum yard footprint of 15 × 40 ft, plus 6 ft clearance on all sides. Total usable space needed: roughly 27 × 52 ft.
- Double-lane slides (16–20 ft tall): Minimum footprint of 18 × 45 ft. With clearance: 30 × 57 ft.
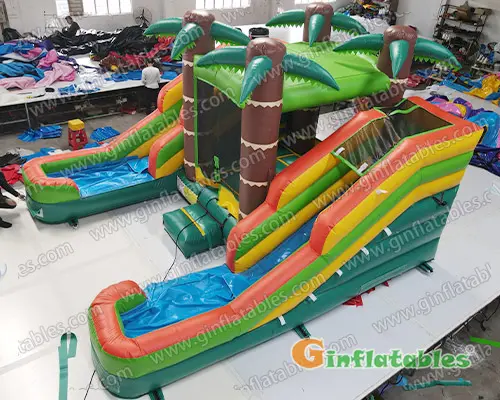
- Combo units with splash pools: Add 10–12 ft to the length. A typical inflatable combo with an attached pool needs 30 × 65 ft of clear space.
Always account for overhead clearance. A 20 ft slide needs zero obstructions — tree branches, power lines, eaves — within the full height plus 3 ft. Walk the setup area and look up before you unload.
Ground Preparation and Surface Requirements
Grass is ideal. It's soft for landing zones and holds stakes well. But not every yard water slide setup lands on a perfect lawn.
Acceptable Surfaces
- Flat grass: Best case. Drive stakes 12–18 inches deep at every anchor point.
- Level dirt or compacted soil: Works fine. Use longer 24-inch stakes and sandbags as backup.
- Concrete or pavers: Requires sandbag-only anchoring — 50 lb bags minimum at each tie-down point. Lay a protective tarp under the unit to prevent abrasion on the vinyl base.
Surfaces to Reject
- Slopes greater than 3 degrees (water pools unevenly; slide tracks sideways)
- Gravel or crushed rock (puncture risk to PVC/vinyl)
- Freshly watered or muddy ground (stakes pull out; unit shifts under load)
Carry a small torpedo level in your setup kit. Five seconds of checking beats a mid-party callback.
Water Supply: GPM, Hose Length, and Hookup
Every water slide for backyard use depends on a reliable water source. Most residential spigots deliver 5–8 GPM at 40–60 PSI. That's enough for a single-lane slide. Double-lane units or slides with splash features need 8–12 GPM — which means asking the customer about their water pressure upfront.
Standard Water Setup
- Hose length: Carry 100 ft of ¾-inch garden hose. Most backyard spigots sit on the house wall, and your slide is at the far end of the yard.
- Splitter: Bring a brass Y-connector so the customer can still use a second hose if needed.
- Flow test: Fill a 5-gallon bucket at the spigot. Under 40 seconds = adequate flow (roughly 7.5 GPM). Over 60 seconds = potential issue.
- Water recycling: For longer events, a submersible pump in the splash pool recirculating back to the top header cuts water usage by 60–70%.
In drought-restricted areas, water recycling isn't optional — it's a booking requirement. Factor in a small 1/3 HP submersible pump and a return hose in your kit.
Electrical Requirements and Blower Placement
Commercial inflatable water slides require continuous airflow from one or two blowers. Here's what the backyard electrical situation usually looks like:
- Single blower (1–1.5 HP): Draws 9–12 amps on a standard 120V/15A residential circuit. One dedicated outlet handles it.
- Dual blower setups (larger slides): Two blowers on the same circuit will trip the breaker. You need two separate circuits — confirm with the customer that they have two outdoor GFCI outlets on different breakers, or bring a generator.
- Extension cords: 10-gauge minimum for runs over 50 ft. A 12-gauge cord over 75 ft drops voltage enough to overheat the motor.
Blower Placement Rules
- Keep the blower intake at least 6 ft from the splash zone — water ingestion kills motors fast.
- Elevate the blower on a small platform or pallet if the ground is damp.
- Position the blower where foot traffic won't trip over the cord or the intake tube.
- Cover the cord path with a cord ramp or bright tape at every walkway crossing.
Anchoring Systems for Residential Settings
Backyard anchoring is different from open-field staking. You're working around sprinkler lines, buried utilities, and landscaping that the homeowner wants intact after you leave.
- Steel stakes (18–24 in): Default for grass and soil. Drive at a 15-degree outward angle. Use a stake cap to protect the D-ring.
- Sandbags (50 lb each): Required on hard surfaces. Double up on corners for slides over 16 ft tall. Water-filled anchor bags work as well and are easier to transport empty.
- Auger anchors: Better holding power in sandy or loose soil. Screw in by hand or with a cordless drill adapter.
Before driving any stake, ask the homeowner about underground sprinkler systems, gas lines, and septic tanks. A punctured irrigation line is a liability you don't need.
Delivery Access and Logistics
The best water slide in your fleet is useless if you can't get it into the backyard. During the booking call, confirm:
- Gate width: Most residential side gates are 36–42 inches. A rolled or folded commercial slide on a hand truck needs at least 36 inches. Measure your largest rolled unit and know the minimum gate clearance.
- Path obstacles: Steps, raised garden beds, low-hanging branches, and AC units along the side of the house.
- Vehicle access: Can your truck or trailer park within 100 ft of the setup area? Longer carry distances add 20–30 minutes to setup.
For operators starting a rental business, build a standard site-check questionnaire. A 5-minute phone screening eliminates 90% of day-of surprises.
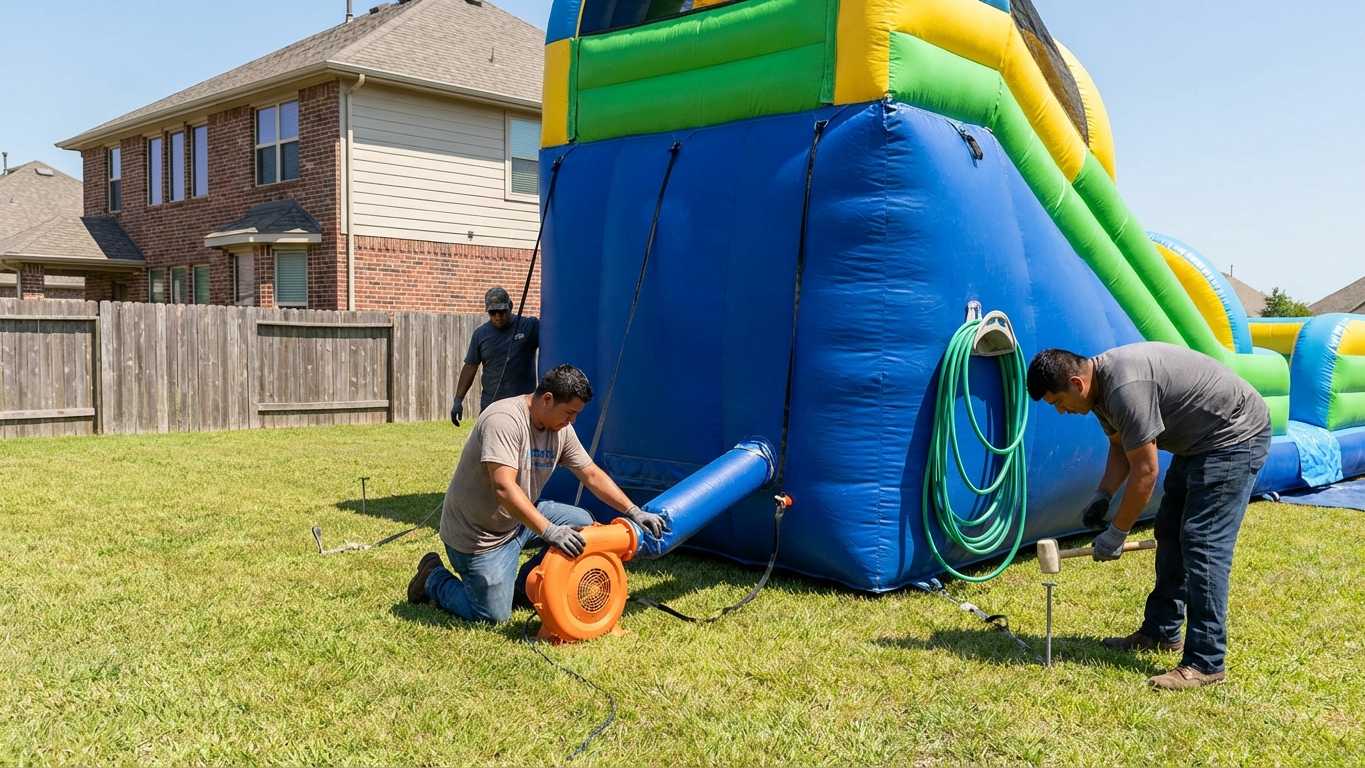
Setup Procedure: Step by Step
A trained two-person crew can set up a standard backyard water slide in 25–40 minutes. Here's the sequence:
- Walk the site. Confirm dimensions, check overhead clearance, locate the water spigot and electrical outlets. Remove any debris, rocks, or sharp objects from the footprint.
- Lay the tarp. A ground tarp protects the slide base from abrasion and makes post-event cleanup faster.
- Unroll and position. Unroll the deflated slide onto the tarp. Orient the splash zone away from the house and toward the yard drain if one exists.
- Connect the blower. Attach the blower tube, seal the secondary air ports, and power on. Full inflation takes 2–4 minutes depending on unit size.
- Stake and anchor. Secure all tie-down points once the unit is fully inflated and positioned correctly.
- Connect water. Run the hose to the top header, open the flow, and verify even water distribution across all lane surfaces.
- Safety check. Walk around the entire unit. Confirm: stakes tight, blower secure, no exposed cords in the splash zone, water flowing evenly, clearance maintained. Take a photo for your records.
Teardown, Drying, and Turnaround
Fast turnaround matters when you're running multiple backyard bookings on a summer Saturday. A sloppy teardown leads to mildew, and mildew leads to early replacement of a unit that should last 3–5 seasons.
- Shut off water first. Let the blower run for 5–10 minutes to push residual water down and out of the splash pool.
- Disconnect and deflate. Open all air ports for faster deflation. Pull stakes while the unit settles.
- Squeegee and towel. Use a push squeegee on the slide lanes and a microfiber towel on the splash pool interior. This cuts dry time in half.
- Roll tight. Fold the sides inward, then roll from the splash end toward the blower tube. A tight roll prevents creases and fits better on the truck.
- Full dry before storage. If the unit goes back to your warehouse, unroll it for a full air-dry within 24 hours. A slip and slide or smaller unit can dry on a fence line; larger slides need warehouse floor space.
Budget 20–30 minutes for teardown. If you're rushing between bookings, the squeegee step alone saves you from a mold problem later.
Neighbor and Noise Considerations
Residential setups mean residential neighbors. A few practices keep complaints away:
- Position the blower on the side farthest from the neighbor's property line. Blower noise at 10 ft is roughly 75–80 dB — equivalent to a vacuum cleaner.
- Set a hard stop time in your rental agreement. Most noise ordinances kick in between 9–10 PM.
- Advise the customer to notify immediate neighbors before the event. A heads-up goes further than an apology after the fact.
Liability and Documentation
Every backyard delivery should include a signed rental agreement that specifies:
- The customer is responsible for supervising riders at all times.
- Maximum rider count and weight limits per the manufacturer's specs.
- The customer confirms the setup surface and overhead clearance are as described during booking.
- Your company is not liable for damage to underground utilities if the customer did not disclose them.
For operators scaling their fleet with water slides built for commercial use, manufacturer documentation on weight limits and safety specs should be part of every rental file.
Matching Slide Size to Typical Backyards
Not every backyard can handle your flagship 22-ft double-lane. Here's a practical sizing matrix:
- Small yards (under 30 × 50 ft): Single-lane 12–14 ft slides only. These are your bread-and-butter residential units — light enough for a two-person carry, quick to set up, and they fit through standard gates.
- Medium yards (30 × 60 ft): Single- or double-lane slides up to 18 ft. Room for a run-off zone and a spectator area.
- Large yards (40 × 80 ft+): Full-size adult-rated water slides and combo units with attached pools. These bookings command premium pricing.
Stock your fleet with at least two size tiers. The small-yard unit books more frequently; the large-yard unit books at higher revenue per event. Both keep your weekends full.